
Contouring and Polishing Anterior Composite Restorations created with the 3M™ Filtek™ Matrix
Achieving the correct shape is vital to a natural-looking anterior composite restoration. Learn how the 3M™ Filtek™ Matrix, paired with…

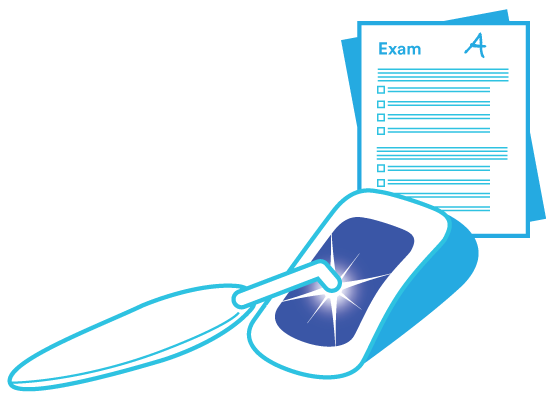
Just because your curing light is on, doesn’t mean it’s working at its best. And an issue in your device or technique could have a big impact on your restoration. It’s time to put your light to the test and take control of your cure.
Restorations are essential, revenue-generating procedures for dentists. During your daily routine, you spend a lot of time and effort making sure that every part of the procedure is well planned and executed – from prep to placement, all the way to the final finish.
Every step is important to ensure lasting results, but perhaps no single step is as critical as light curing. Inadequate cure can generate esthetic and functional problems like discoloration, post-op sensitivity, abrasion, marginal leakage and even fracture. Proper technique goes a long way to ensuring a proper cure, but there’s one simple routine step that does even more: putting your curing light to the test.
Just because your curing light is on, doesn’t mean it’s delivering the proper output for your restorative material. If your light isn’t calibrated or functioning properly, you could be under-curing or over-curing without realizing it. By regularly and systematically monitoring the health of your curing light, you can take back control of your cure – and help ensure more predictable restorative success.
In an ADA survey of how often dentists check their curing lights, 3% of dentists said daily, 19% said weekly, 31% check 1–6 months, and 11% only once a year.1 These numbers indicate that upkeep on curing lights is inconsistent industry-wide – but if you don’t check your curing light frequently enough, you can expect inconsistent results as well.
Inadequate light means fewer photo initiators are activated, leading to incomplete polymerization. And incomplete polymerization can reduce the mechanical properties of the composite or cement. In my opinion, the worst situation that could occur from an underperforming curing light is an inadequately polymerized adhesive, leading to lower bond strength and possible adhesive failure – which, in turn, could lead to secondary caries or postoperative sensitivity. Typically, the outer layer of the composite restoration will become hard to the touch even if it’s inadequately polymerized internally – making it that much more difficult to guarantee a thorough cure. Plus, incorrect positioning of the curing light can cause an external portion of the composite to be soft, such as the bottom of a class II box.
With all of these risks in mind, how often should you be checking your devices to ensure a complete cure? There’s a great quote from noted Prosthodontist Dr. Richard Price stating that “dentists should re-check the output of their curing light after they completed as many restorations as they would be comfortable re-doing.” In other words, if a dentist tests their curing light and finds it to be defective, every restoration cured with that light prior to the last checkup could have been affected and may need to be redone.
Many practices will find it easiest to check their lights once a month, depending on their equipment. However, the more often you check your devices, the better. Checking once a day is best but is a lot to commit to – once a week is a good realistic goal. Add it to your practice’s weekly checklist to make sure it gets done. Though if the light is dropped, or any visible damage occurs, you should check right away.
That being said, before you can consider testing frequency, you need to make sure you have the right testing tools. Checking the output of a curing light can be very easy or a hassle depending on whether or not you keep a radiometer on hand. Without a radiometer, you can’t do any testing on-site – which obviously makes it difficult to adhere to a regular testing schedule. An in-office radiometer can give you a good general idea of how your lights are functioning and reveal shortcomings before they become an issue.

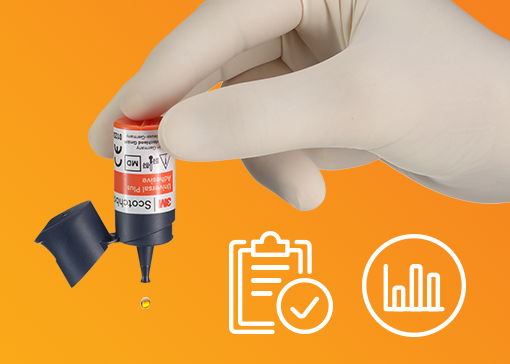
As mentioned above, radiometers can be a useful tool to gauge the health of your curing light – but won’t provide the accuracy of laboratory-grade power meter. Using resources like the Bluelight CheckUp Radiometer or the CheckMARC program can help you take a closer look at your devices and better understand what the radiance values mean for your restorative procedures.
The CheckUp Radiometer features software and a paired app to provide additional insights – such as what to do with the information you get, how it correlates to how long you should cure your composite, how to cure your adhesives, and more.5 Once you input your model of curing light, you can find out how much of the energy you’re using is actually delivered to your composite and translate that into an appropriate cure time. Plus, it takes the surface area of the curing light tip into account, providing a larger picture of the device’s capabilities. It also records the information for you, so you have a reference of how you’re doing over time, and gives reminders to help you incorporate checking into your routine.

The CheckMARC program, on the other hand, is a professional service that tests the efficacy of your curing lights and materials on-site and provides expert-advice to optimize your procedure.5 Unlike regular radiometers, CheckMARC is able to account for active diameter, wavelength and saturation for maximum accuracy. CheckMARC also offers the option to measure at a distance of 6 mm. This simulates what happens clinically, especially when using bulk fill composites and placing the material all at once, or when you need to fill a big and deep Class II cavity.

Composites require a certain amount of energy for complete polymerization, and this means your curing light needs to deliver the right radiance. The manufacturer’s instructions for use (IFU) for composites will typically present a recommended curing time when using a curing light of a certain radiant emittance. Multiplying that minimum curing time by the minimum required power of the light will give an estimation of the energy required to cure the composite.
With all of the above in mind, there is a range of irradiance that can yield better outcomes – and it’s up to you to make sure your light delivers within this range. While a mediocre light may perform well enough, it may not be able to consistently give you good irradiance. As a benchmark, I think of 1000mW/cm2 as being a respectable radiant emittance for a curing light. Thankfully, many modern lights have even higher outputs, which can help ensure proper photopolymerization.
While regularly maintaining a high-quality curing light is very important to optimizing your procedure, there are several other factors you need to consider:
Using disposable translucent barriers – such as wraps, tip sleeves, and finger cots – can be beneficial in many ways, including helping prevent contact with oral tissues, thereby eliminating the time and expense of sterilization. However, they can impact the power of your curing light.
Dr. Price recently published a study looking at the effect of barriers on irradiance and found that barriers can reduce the output of your curing light. If the barrier is applied incorrectly, such as with the seam across the light tip, it could significantly reduce the power density from the curing light.2
With this in mind, you should choose your barriers carefully and use barriers designed for your curing light whenever possible, as well as make sure to apply them correctly. An improvised barrier, like saran wrap, might not affect your light – but neither will it provide adequate infection prevention, as that’s not its intended purpose. In order to prevent any interference, test your curing light output with and without an infection control barrier, so you can know whether or not you need to adjust the cure time.
Even if you’re using barriers, it’s important to clean your curing light between uses – not only to ensure sterility between patients, but also to keep your device working at optimum efficiency.
Residue from your composite or adhesive could stick to the tip and reduce output. I’ve tested curing lights, cleaned them, and then re-tested, and seen a difference of 200 mW/cm2 in the output. Something as simple as using an alcohol wipe on the tip of the curing light could increase the performance of your device. It’s not worth investing in a more expensive light if you could use a $0.02 wipe and achieve the same performance increase. So, before you assume that you need to replace the battery or the light, check the tip first!
More than anything, good technique is key. The light should be as close to and as parallel with the surface being cured as possible. Additionally, the light should be centered over the material being cured. Tilting the curing light may cause the surrounding tooth structure to block the light from being delivered to the intended surface and affect polymerization.
And while often overlooked, strong communication is actually a critical part of your technique. In many dental practices, the light curing task is passed off to the dental assistant – so it goes without saying that they should know what your composite needs for a proper cure. In addition, make sure every member of the team uses sufficient eye protection. Because you shouldn’t look directly at the light, many clinicians will simply turn away – but how can you guarantee accuracy if you’re not looking? That’s where eye protection barriers come in, both on your device and on your eyes: so you can keep an eye on the placement of your light tip.

Clinicians always ask: how do you differentiate a good curing light from a poor one? One way is to evaluate beam parallelism: the loss of power as the light moves away from the tooth. My mentor, John Burgess, did an oft-quoted study in which he measured over 50% reductions in bond strength when the curing light was separated from the tooth by more than 4mm.3
In that study, a traditional quartz tungsten halogen curing light was used, but newer LED curing lights have more parallel light beams. Some initial testing in our lab suggests that newer LED curing lights are less affected by distance from the surface being cured. Despite this improvement in curing lights, the curing light should still be maintained as close to the tooth as possible.
However, many of us are performing deeper Class II preparations, which put the adhesive that much further from the light. The adhesive is what’s going to help develop your bond to the composite – so it’s critical your light can go the distance. Thankfully, using resources like CheckMARC enable you to see how well your light performs at a clinically relevant distance.

Some dental professionals don’t trust their light to cure the composite completely and end up overcompensating – and overcuring. Alternatively, some clinicians don’t know the cure times of their materials and how the output of their light could affect that time. This can lead to wasted time and unnecessary heat on top of overcured composite. Regardless of the reason, overcuring can actually do damage.
Curing for too long can cause overheating, which can damage the pulp. Plus, overcuring can thin the oxygen inhibited layer, causing defects between the adhesive and the composite resin. A thick oxygen inhibited layer can help produce a better bond to the curing composite.
Although curing lights can produce heat in the pulp chamber, several practices can help dampen any increase in pulpal temperature. While the pupal fluid alone will help lower the temperature, utilizing water spray, or air-drying on the pulp during bonding can help reduce heat significantly. During curing, however, your options are more limited. Dr. Cesar Arrais, for example, inserted a thermal probe in the pulp and showed that putting air or water on the tooth cools down the pulpal temperature.4 If you have multiple cures to perform on the same tooth, blowing some cool air on the teeth in between cures can cool things down, without interfering with the bond (like water would).
It is also important to be cognizant of overheating soft tissue. When curing crown margins and Class V composite, the light should not be directed to the soft tissue for an extended period of time. Take breaks or alternate teeth, so that you’re not focusing on one tooth for 60 seconds at a time. One should also be aware of heating soft tissue under a rubber dam, which can lead to elevated temperatures due to the insulating effect of the dam.
With all of this in mind, what’s the number one thing you can do to avoid heating up your procedure? Check your curing light regularly. Using the CheckMARC service or CheckUp device can tell you exactly how long you need to cure your adhesive at the distance you need – helping you save time and reduce heat.
To get the most out of your materials, you need to first get the best out of your curing light – and that means monitoring and regularly checking your devices.
As much as we’d all like our equipment to always work perfectly, we know that’s simply not possible. Just like any other tool in your office, your curing light can and will run down with use and won’t always work at optimum levels. But if you get to know your curing light – maintain it, regularly check its output, keep a record of its performance – and practice proper technique, you can take better control of your restorative procedures, and ensure more consistent results.
Sources

Achieving the correct shape is vital to a natural-looking anterior composite restoration. Learn how the 3M™ Filtek™ Matrix, paired with…
Direct composite restorative procedures can be challenging, particularly when it comes to esthetic cases. Discover how new techniques and tools…
When choosing a new universal adhesive for your office, you have a lot to consider – including clinical history. Take…