Zirconia puzzle: what makes zirconia unique and how to choose the right zirconia
Zirconia may be part of your everyday vocabulary, but how much do you know about this ceramic material? Learn more…


Under the right circumstances, post and core reconstruction can be an excellent option following a root canal. And as with any multi-step procedure, many different points can make or break the result. Get expert tips and tricks for a predictable and stable post and core reconstruction, from start to finish.
A post and core restoration is indicated when a significant amount of a root canal treated tooth’s original coronal structure has been lost, and there’s not enough left to support and retain an indirect restoration. And while not every tooth is a candidate for a post and core restoration, those that are require very specific steps that must be followed to ensure success. It’s important to keep in mind that these steps start long before post placement – and mean paying careful attention to the key areas, including:
Before undertaking a post and core restoration, it’s critical to measure all dimensions of the tooth and its affected root. These measurements (in four key areas) help ensure a proper fit and adequate support for the restoration and reduce stresses on the tooth (fig. 1). From the root to the core, they are as follows (fig. 2):

Figure 1: Key areas of post and core prep.

Figure 2: Required measurements for each key area.
For a proper fit, the canal must be prepared correctly. The post cannot be loose inside the canal: if the cement shrinks, the post may become loose and the whole restoration may come off, and if the restoration moves, it can fracture the tooth. Many systems utilize a guide that you can superimpose over an x-ray to look at the size of post for prep, but this system can cause distortions that in turn can lead to choosing the wrong post size and, ultimately, an inaccurate prep.
The correct way to approach prep is to use a bur 50 microns larger than the post (25 microns on each side) to create the ideal cement gap (fig. 3). Start by removing some of the gutta percha with a Gates Glidden bur to the desired length, while maintaining a sufficient apical seal (4-5mm). Prepare the canal with a universal drill, cleaning the walls and finish for adequate post length. From there, start with the smallest bur size in relation to the fiber post kit. Increase the bur size consecutively until the bur and corresponding post engage with the wall of the root canal. Try-in the post between each drill to ensure you don’t take away more than you need. Endodontically-treated teeth are fragile and more prone to fracture, so be careful not to make the tooth even more fragile by removing too much tooth structure. With this in mind, you don’t necessarily have to use every drill. Stop when you reach the drill that engages the canal to create optimal cement space. Make sure to use the smallest possible post after you obtain engagement, as the post diameter should not exceed 1/3 of the entire root diameter.

Figure 3: A tooth being prepped. In this instance, after the Gates Glidden bur and thin universal drill are used, the length of the prep is measured – 10mm is sufficient for an anterior tooth. From there, the tooth was prepped from the smallest bur (#0 white) upward until the drill engaged the canal – in this case, #3 blue.
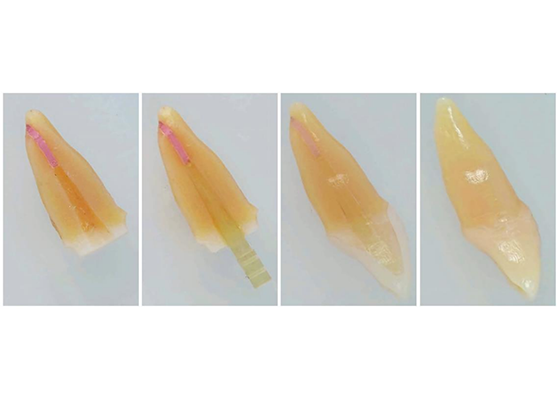
Post length can have a significant impact on retention, making this step in your procedure critical to long-term success. When trying-in the post, move the colored ring down to mark the point to make the cut. The crown will be the height of the neighboring teeth – the post length should be 2-3mm less than neighboring teeth. Be sure to not cut the post too short, as the top needs to be fully embraced by the composite. Once the right length has been determined, the fiber post needs to be shortened perpendicularly to the fibers to avoid fiber damage (fig.4). A diamond disc does this very efficiently.
The post needs to be thoroughly cleaned after having been touched during measuring and cutting to remove contamination like skin oils. Wipe the post with alcohol, and make sure not to touch it again. With some posts, you’ll need a primer to prepare for cementation, however, modern options, like 3M™ RelyX™ Fiber Posts, do not require that step. They are made with a resin that enables a direct bond to 3M self-adhesive cements, saving time and simplifying the procedure.

Figure 4: Shortening of the fiber post, followed by cleaning.
When it comes to post cementation, it’s important to choose the right materials. A combination of the right pretreatment, a self-adhesive cement and fiber post that doesn’t require pretreatment can help reduce steps and the chance of mistakes, as well as simplify the procedure.
Some clinicians still use adhesive together with cement, but this can cause issues. Adhesive needs to be air dried, which is tricky in a root canal and adds an extra step to your procedure. Plus, adhesive residue, uncured material or remaining propellant can create a risk of voids and interfere with post seating. Plus, the application microbrush is often too thick to go inside the canal, meaning a thinner brush is needed to apply adhesive in a controlled way. Self-adhesive cements like 3M™ RelyX™ Unicem 2 Self-Adhesive Resin Cement or 3M™ RelyX™ Universal Resin Cement, on the other hand, have standardized application tips which allow for good void-free distribution from the bottom up.
Before placement, use ≤5% sodium hypochlorite solution to clean the canal. It’s important to rinse the prep with water thoroughly – do not let the hypochlorite solution remain in the canal, as it could weaken the bond. Use a paper point to remove excess water without overdrying the canal. You want the dentin to remain moist for an optimal bond. After cleaning the treatment surfaces, there are two easy steps to follow for successful post placement.

Figure 5: Application of self-adhesive cement.

Figure 6: Side-by-side comparison of the standard elongation tip attachment (left) to the 3M™ RelyX™ Universal Resin Cement elongation tip (right).

Figure 7: Insertion of shortened fiber post.
From cementation to buildup, make sure carefully time your process – do not prepare the buildup too early. Wait a minimum of 6 minutes, ideally 10, for the cement to polymerize to avoid disrupting bonding. Don’t just place the post and start preparing. Cement, wait 10 minutes, then buildup.
As in the previous step of post placement, there are two main steps to follow for the core build up:

Figure 8: Application of adhesive to tooth and fiber post.
Figure 9: Application of the bulk fill composite in one or two increments for the build up.
Figure 10: Complete core build up before preparation.
Post and core procedures can be challenging, but they don’t have to be. By paying attention to the little details and key areas listed below, you can set yourself up for success (fig. 11):

Figure 11: Anterior and posterior tooth post and core build-up summary.

Zirconia may be part of your everyday vocabulary, but how much do you know about this ceramic material? Learn more…

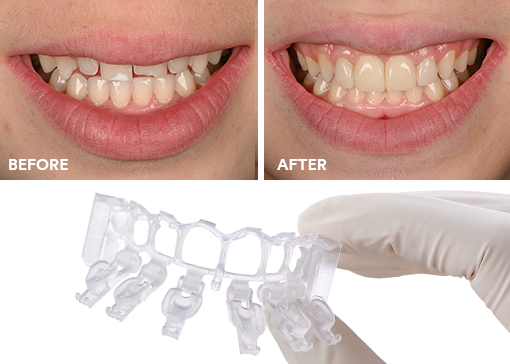
Achieving the correct shape is vital to a natural-looking anterior composite restoration. Learn how the 3M™ Filtek™ Matrix, paired with…

Direct composite restorative procedures can be challenging, particularly when it comes to esthetic cases. Discover how new techniques and tools…