
Clinical Case: Dual Shade in Class IV Composite Replacement
Using 3M™ Scotchbond™ Universal Adhesive and 3M™ Filtek™ Supreme Ultra Universal Restorative.


Using 3M™ Scotchbond™ Universal Adhesive, 3M™ Filtek™ Supreme XTE Universal Restorative, 3M™ Elipar™ DeepCure-S LED Curing Light, 3M™ Sof-Lex™ Contouring and Polishing Discs, and 3M™ Sof-Lex™ Diamond Polishing System.
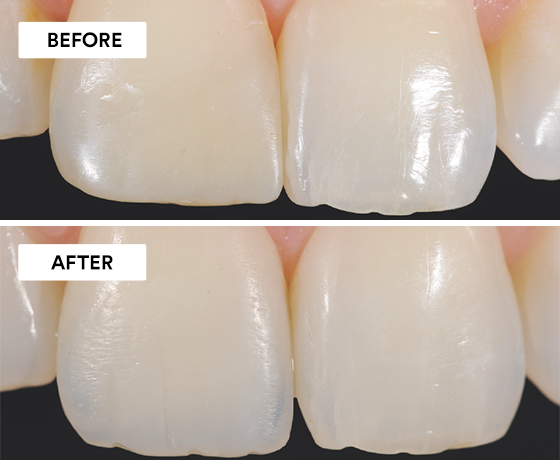
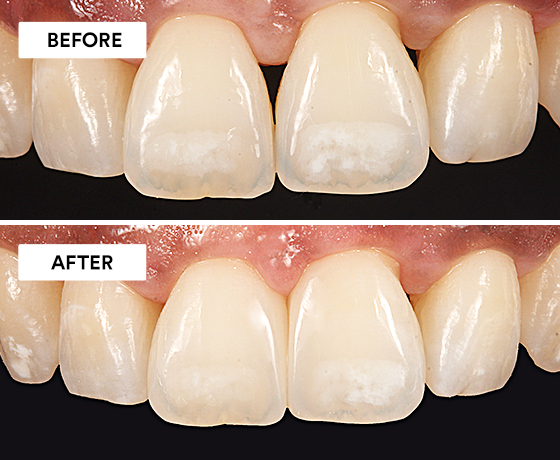
Eight years after restoration of a fractured upper right central, this patient was no longer satisfied with the esthetics and desired a more natural look.
The Challenge was to provide high-level, natural esthetics, using a simplified shading and layering technique.
Learn more about the products used in this clinical case |

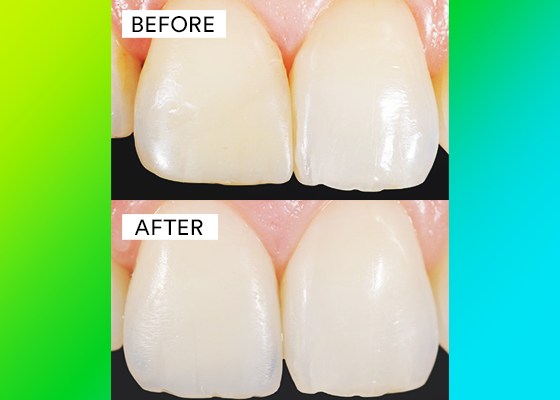
Initial Situation: Upper right central incisor with an unsatisfactory composite restoration.

A guide was made with silicone impression material in order to replicate the incisal anatomy.

The old restoration was removed using a ceramic bur taking care not to harm the adjacent tooth structure.

Removing interproximal debris.

Final preparation prior to placement of adhesive. Tooth was etched with 3M™ Scotchbond™ Universal Etchant followed by rinsing and air drying.

3M™ Scotchbond™ Universal Adhesive was scrubbed into the preparation for 20 sec followed by 5 sec. air-drying and 10 sec. light-curing with 3M™ Elipar™ DeepCure-S LED Curing Light.*

Placement of the palatal layer of 3M™ Filtek™ Supreme XTE Universal Restorative A3E with the aid of the silicone matrix.

Sectional matrix placed cervico-incisally to give a round contour to the proximal wall.
Clinical Tip:
Use a sectional matrix, placed vertically, to create anterior proximal walls with anatomically correct contours.

Mesial wall after light curing* and removal of the sectional matrix. The contour of the wall is precise, rounded and clean, especially in the cervical area where no excess is present.

Placement of A2D shade of 3M™ Filtek™ Supreme XTE Universal Restorative.

The depth of the dentin layer is calibrated with a Misura instrument (LM-Arte). The composite excess is removed and the incisal edge is contoured in order to leave 0.5 mm space for the final enamel layer of composite.

Placement of A3E shade of 3M™ Filtek™ Supreme XTE Universal Restorative. The final layer should be as smooth as possible before light-curing for 10 seconds with an LED curing light (1000–2000mW/cm²).*

Finishing with a low-speed medium/coarse diamond bur to smooth the surface.

Final restoration immediately after finishing and polishing.

After rubber dam removal the restoration looks slightly yellowish due to dehydration.

Final restoration.
Refer to Instructions for Use (IFU) for complete product information. Results may vary.
* Light cured according to the manufacturer’s guidelines.
Using 3M™ Scotchbond™ Universal Adhesive and 3M™ Filtek™ Supreme Ultra Universal Restorative.
Using 3M™ Single Bond Universal Adhesive, 3M™ Filtek™ Supreme Flowable Restorative, 3M™ Filtek™ Universal Restorative, 3M™ Elipar™ Deep Cure-S LED…
Using 3M™ Scotchbond™ Universal Adhesive, 3M™ Filtek™ One Bulk Fill Restorative, and the 3M™ Sof-Lex™ Spiral Finishing and Polishing system.