
Zirconia puzzle: what makes zirconia unique and how to choose the right zirconia
Zirconia may be part of your everyday vocabulary, but how much do you know about this ceramic material? Learn more…


Veneers can transform smiles, but they’re only successful if the teeth have been properly prepared. Explore the veneer preparation protocol, and learn how to set the stage for stunning smiles – step by step.
Veneers are a conservative and minimally invasive esthetic treatment for discolored, worn, chipped, malformed or misaligned teeth. Before the veneer can be placed, however, teeth need to be properly prepared. This can be difficult, especially since there’s a lot on the line in these early steps: trying to be as conservative as possible, finding a balance between function and esthetics, ensuring predictable, accurate clinical results, and fulfilling patient expectations. Add to this the variety of today’s material options and preparation designs, and it’s clear that simple and standardized case-specific clinical protocols are necessary to guarantee success. In this article, I will discuss the veneer preparation procedure, from treatment planning and lab communication to tooth preparation, and how to ensure success every step of the way.
With something as highly esthetic as veneers, it’s important to start with the final restoration in mind. Will your treatment plan meet the patient’s esthetic expectations and functional needs? How do you ensure your vision translates accurately?
Enter diagnostic wax-ups.
Diagnostic wax-ups are critical to veneer planning, as they provide a preview of the proposed outcome of esthetics and function – before any irreversible changes are made. Traditionally, diagnostic wax-ups are made of wax sculpted onto a cast model of the patient’s teeth (with or without reduction of teeth) by a dental technician. Today the diagnostic wax-up can also be created digitally (fig 1). Regardless of how they’re produced, diagnostic wax-ups serve the same purposes:
In addition, and perhaps most importantly, diagnostic wax-ups serve as a communication tool between dentist, the lab technician and the patient. It helps patients see and fully understand their treatment plans, as it can be challenging to visualize the outcome from descriptions alone. Patients come in wanting specific results. If they’re unhappy with the wax-up, there’s still time to make alterations. Once the wax-up is approved, a mockup and preparation guide can be created.

Figure 1: Digital smile design and diagnostic wax-up. Images courtesy of Prof.
Paulo Monteiro.
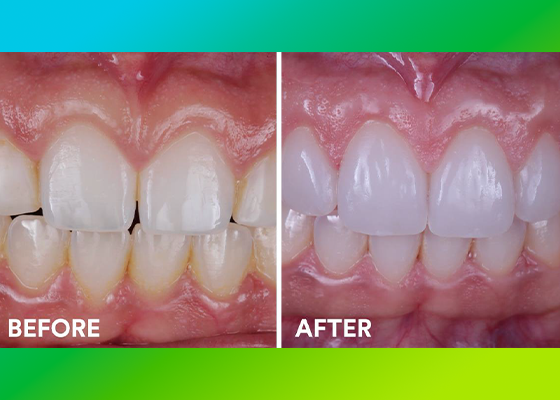
Patients don’t just want beautiful veneers; they want veneers that fit naturally into their smiles, which is easier said than done. Not only do you need to take the shade of patient’s current smile and esthetic goals into account, but also the individual characteristics of the prepared teeth – and then communicate all this information thoroughly and accurately to the lab. The lab can only work with the information they’re given, and any details left out can lead to unesthetic, unnatural looking results and unhappy patients.
As with any restoration, make sure to take the shade at the beginning of the appointment, while the teeth are still completely hydrated. Teeth can dehydrate within the first minute of isolation, and dehydrated teeth are whiter and brighter than natural teeth. This step is particularly important if the veneer needs to match the adjacent teeth exactly (e.g., when only one tooth will be treated with a veneer). From there, taking pictures can greatly help the technician ensure accuracy – simply listing a shade on a form may not be enough! Take pictures of the smile, adjacent teeth (if applicable), and preparation with the shade guide from multiple angles and, if possible, in different types of lighting to give the lab as much detail as possible. Keep in mind that the shade of the prepared teeth can influence the final appearance of the ceramic restoration. For example, if the teeth are discolored (e.g., a devital tooth, fluorosis), then the lab needs this information in order to properly choose the ceramic to create the desired result. Without all the information, they can’t deliver the correct final shade.

Figure 2: Shade selection. Image courtesy of Prof. Paulo Monteiro.
Thankfully, new technologies have been developed to address these challenges, including in-office color measurement devices and correlated shade matching software in the lab. This technology allows dental professionals to scan and send images directly to the lab, where they can then develop customized color “recipes” to guide them toward the most natural looking results.
While a diagnostic wax-up can help dental professionals and patients see possible results from an external perspective, it can be difficult to visualize how a treatment plan will translate intraorally. This is where a mock-up comes into play. Mock-ups take the treatment proposed in the diagnostic wax-up and transfer it directly into the patient’s mouth.
Mock-ups are traditionally made by taking an impression of the wax-up, either chairside in silicone, vacuum-formed or 3D-printed in a lab. The mold is then filled with temporization material, such as 3M™ Protemp™ 4 Temporization Material, and placed into the patient’s mouth (Figure 3). In any case, this step is critical to ensuring that patients have realistic expectations for their treatment, while allowing the dental professional to preview and alter their plan non-invasively.

Figure 3: Mockup step by step. Images courtesy of Prof. Paulo Monteiro
1. Matrix is loaded with bis-acrylic temporary material.
2. Filled matrix is inserted over the patient’s teeth.
3. After curing of temporary material excess is removed.
4. Final mock-up intra-orally.
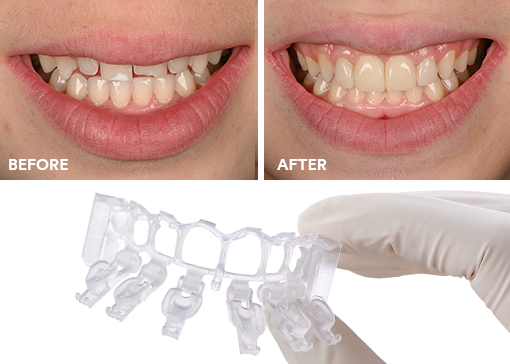
Two of the biggest challenges associated with veneer preparation are (1) estimating how much dental tissue needs to be removed to accommodate the restoration material and (2) avoiding excessive tissue removal. This is where preparation guides come into play.
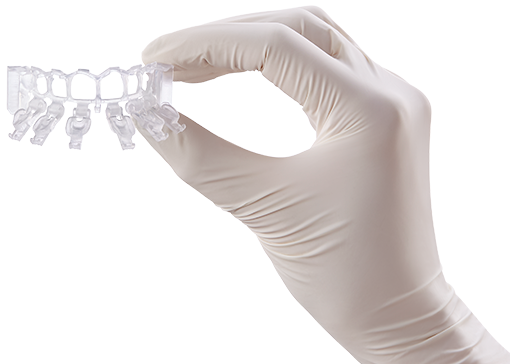
Preparation guides, or reduction guides, are used to help confirm appropriate tooth reduction to accommodate the necessary ceramic thickness, while simultaneously preventing any overpreparation. There are several ways to produce a preparation guide: one option is to fabricate a silicon index from a putty impression material. Guides can also be created digitally and 3D-printed.
Once fabricated, the preparation guide seated intraorally and used to visually evaluate and quantify clearance for the future restoration (fig. 4).
The guide can also be cut and manipulated to make evaluation easier (fig 5). For example, the facial preparation guide can be sliced horizontally into three planes, which can be pulled back during preparation to check for space. This enables dentists to achieve more predictable and more conservative preparations – ultimately saving more healthy dental tissue.
If a silicon index is not employed, the mock-up can be used together with calibrated diamond burs to create depth gauges for a guided preparation – to help ensure that only the necessary amount of tooth is removed (fig. 6).

Figure 4: Use of a silicone index to check space created. Image courtesy of Prof.
Paulo Monteiro.

Figure 5: Use of a sliced silicone index to check how much space is created in
different areas of the tooth. Image courtesy of Prof. Carlos Eduardo Sabrosa.

Figure 6: Guided preparation through a bis-acrylic mock-up: cervical and facial
depth grooves. Image courtesy of Prof. Paulo Monteiro.
Proper preparation is vital to the veneers’ esthetics, functionality, and longevity – and it should be performed meticulously and thoughtfully. The restorative material thickness required for each case depends on a number of factors, including material, desired shade, strength considerations, and the patient’s parafunctional habits, such as bruxing or clenching. These, along with several other factors, should be considered before preparing the teeth:
Start with the mock-up in the patient’s mouth – this enables better control of enamel removal and a more conservative prep. Beginning with the facial preparation, cut grooves into the mockup to the depth required by the material on the cervical third, mesial third, and incisal third of the tooth and mark with a pencil. Without these marks, it can be difficult to see exactly when you’ve reached the correct depth. However, with these marks in place, you stop when the bur touches the mark and know you have the space you need. After the facial reduction is complete, the proximal margins should be extended to the interproximal contact point. While it’s not always necessary to open the interproximal contacts, such as for diastemas or overlapping teeth, extending the preparation into the interproximal area helps to conceal margins, allow for more accurate impressions, and improve adhesion (Figure 6). Last is the incisal reduction with a minimum of 1.5mm, checking against the prep guides and periodontal probe as necessary. From there, any sharp internal angles in the prep should be rounded out with a disc, then a rubber point can be used to smooth the prep surface before any impressions are taken. Alternatively, the preparation can be polished with fine grain burs.

Figure 7: Step by step veneer preparation. Illustrations courtesy of Prof. Paulo Monteiro.
While extremely rare, there are a few circumstances that don’t require much prep at all. In these cases, commonly referred to as “no prep veneers,” ceramic is added on top of existing tooth structure. I prefer the term “prep less” over “no-prep,” as you almost always have to prep something. For example, even with no-prep veneers, I like to at least make some delineation on the cervical gingival margin – both for visualization and so the dental technician knows where the finishing line will be, so we don’t have any unfortunate surprises when we go to cement and find that it reaches the gingival margin.
While achieving a successful esthetic restorative procedure like veneers can be complicated, you can set yourself up for success if you begin with thorough planning and preparation. From wax-up to mockup, and from shade selection to preparation, remember these three key points:
If you follow these guidelines, you can consistently set the stage for stunning smiles – and happy patients.


Zirconia may be part of your everyday vocabulary, but how much do you know about this ceramic material? Learn more…
Achieving the correct shape is vital to a natural-looking anterior composite restoration. Learn how the 3M™ Filtek™ Matrix, paired with…
Direct composite restorative procedures can be challenging, particularly when it comes to esthetic cases. Discover how new techniques and tools…